An ERP (Enterprise Resource Planning) system is a web application that helps businesses manage and automate core processes like inventory, accounting, human resources, sales, and customer relationships all in one place.
In web development, building an ERP system means creating a platform that allows different departments to work together more efficiently and in real-time.
Why is ReactJS the Perfect Choice for Building ERP Applications?
ReactJS is a powerful JavaScript library used for building fast and responsive user interfaces.
When it comes to ERP applications, ReactJS makes the development process smoother and more scalable.
Because of its component-based architecture, it’s easy to manage complex UI layouts and dynamic data, two essentials of any ERP system.
If you’re planning to create a custom ERP in React, ReactJS gives you flexibility, speed, and a vibrant ecosystem of tools.
That’s why this ReactJS ERP tutorial is perfect whether you’re a developer building for clients, a startup founder, or a business looking for a custom in-house solution.
In this blog, we’ll walk you through how to build a complete ERP system in ReactJS step-by-step. You’ll get:
- Clean and well-structured React code with explanations.
- Access to the full GitHub repo.
- A real-world ERP application in ReactJS with common modules.
- Troubleshooting tips and deployment advice.
By the end, you’ll have a working ERP web app that you can customize for any business need.
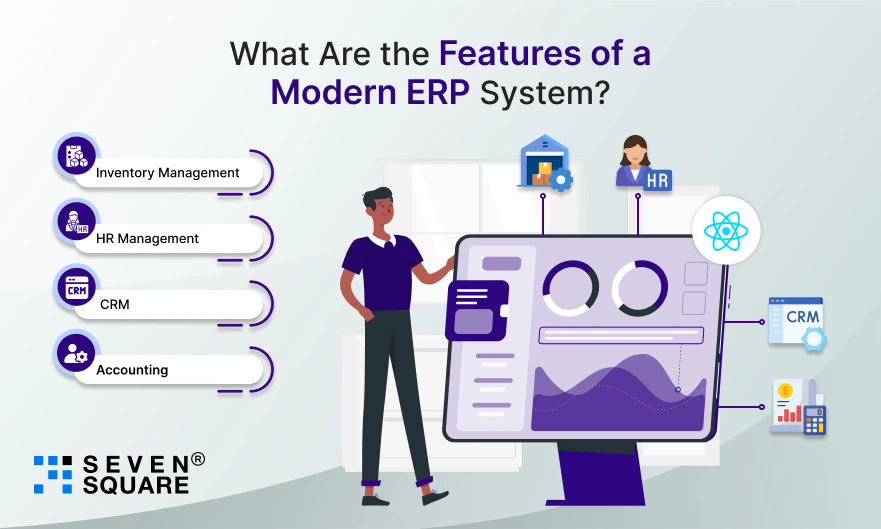
What Are the Features of a Modern ERP System?

A modern ERP system features several key modules to simplify business processes.
In this tutorial, we’ll show you how to build these essential ERP modules for a web app:
- Inventory Management: Track stock levels, suppliers, and orders.
- HR Management: Manage employees, roles, leaves, and attendance.
- CRM (Customer Relationship Management): Handle leads, clients, and communication.
- Accounting: Record transactions, generate invoices, and monitor cash flow.
These modules make up the foundation of any scalable ERP solution.
How a Web-Based ERP System Improves Business Efficiency?
A web-based ERP system allows real-time access to business data from anywhere.
It reduces manual tasks, eliminates data duplication, and improves cross-department collaboration.
Whether you’re a developer building for clients or a business owner looking to automate operations, integrating these ERP modules for web apps is a smart and future-ready solution.
What Tools & Tech Stack Are Required?
To build a modern, high-performance ERP application in ReactJS, you’ll need a solid tech stack. Here’s what we’ll use:
1. Frontend:
- ReactJS (using Vite or Create React App for faster setup and performance).
- Component Libraries like MUI or TailwindCSS for professional UI.
2. Backend (Optional but Recommended for Full Stack ERP Project):
- Node.js + Express.js for REST APIs.
- MongoDB for storing business and module data.
3. Version Control & Hosting:
- GitHub to store and share your code.
- Vercel (or Netlify) to deploy your app live.
This full-stack setup ensures your ERP app is scalable, secure, and easy to maintain.
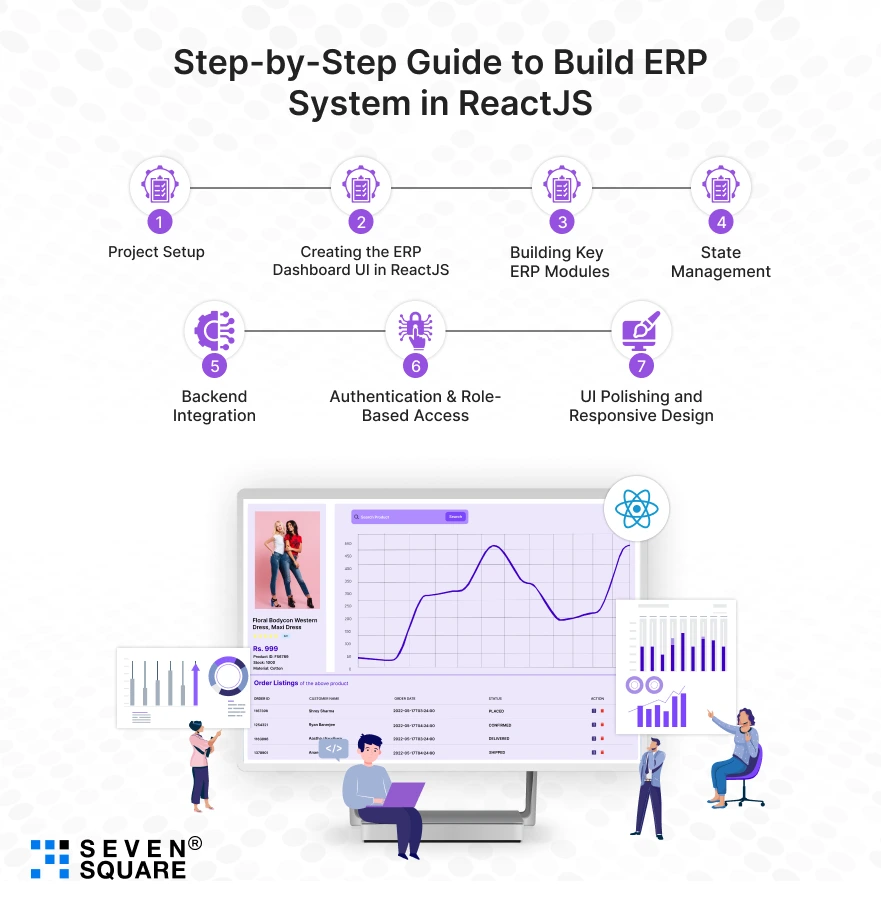
Step-by-Step Guide to Build ERP System in ReactJS

If you’re looking to build an ERP with React, you are at the right place.
Here we will walk you through every step, from project setup to creating real ERP modules with clean code and responsive UI.
Whether you’re a developer, startup founder, or business owner, this guide will help you create a professional ERP system in ReactJS.
Step 1: Project Setup (React App + Folder Structure)
Let’s begin by setting up our ERP project using Vite (much faster than Create React App):
                npm create vite@latest react-erp-system --template react
                cd react-erp-system
                npm install
                npm run dev
Install essential packages:
npm install react-router-dom axios
Recommended folder structure:
                /src
                /components
                /pages
                /modules
                    /Inventory
                    /Employees
                    /CRM
                /context
                /services
                /utils
                App.jsx
                main.jsx
Step 2: Creating the ERP Dashboard UI in ReactJS
An ERP system needs a sidebar, top navbar, and a main content area. Let’s create a basic layout:
components/Layout.jsx
                import Sidebar from './Sidebar';
                import Topbar from './Topbar';

                const Layout = ({ children }) => (
                <div className="flex h-screen">
                    <Sidebar />
                    <div className="flex-1 flex flex-col">
                    <Topbar />
                    <main className="p-4 overflow-y-auto">{children}</main>
                    </div>
                </div>
                );

                export default Layout;
Use TailwindCSS or MUI to style the components for a clean UI.
Step 3: Building Key ERP Modules (with Code Examples)
1. Employee Management Module
modules/Employees/EmployeeList.jsx
                import { useEffect, useState } from 'react';
                import axios from 'axios';

                const EmployeeList = () => {
                const [employees, setEmployees] = useState([]);

                useEffect(() => {
                    axios.get('/api/employees').then(res => setEmployees(res.data));
                }, []);

                return (
                    <div>
                    <h2 className="text-xl font-bold mb-4">Employees</h2>
                    <ul>
                        {employees.map(emp => (
                        <li key={emp.id}>{emp.name} - {emp.position}</li>
                        ))}
                    </ul>
                    </div>
                );
                };

                export default EmployeeList;
2. Inventory Management Module
modules/Inventory/InventoryList.jsx
                const items = [
                { id: 1, name: 'Laptop', quantity: 12 },
                { id: 2, name: 'Monitor', quantity: 8 }
                ];

                const InventoryList = () => (
                <div>
                    <h2 className="text-xl font-bold mb-4">Inventory</h2>
                    <table className="table-auto w-full">
                    <thead>
                        <tr>
                        <th>Name</th>
                        <th>Quantity</th>
                        </tr>
                    </thead>
                    <tbody>
                        {items.map(item => (
                        <tr key={item.id}>
                            <td>{item.name}</td>
                            <td>{item.quantity}</td>
                        </tr>
                        ))}
                    </tbody>
                    </table>
                </div>
                );

                export default InventoryList;
3. CRM / Client Records Module
modules/CRM/Clients.jsx
                const clients = [
                    { id: 1, name: 'Acme Corp', contact: 'acme@example.com' },
                    { id: 2, name: 'Globex', contact: 'info@globex.com' }
                ];

                    const Clients = () => (
                    <div>
                        <h2 className="text-xl font-bold mb-4">Clients</h2>
                        <ul>
                        {clients.map(client => (
                            <li key={client.id}>{client.name} – {client.contact}</li>
                        ))}
                        </ul>
                    </div>
                    );
                export default Clients;
Step 4: State Management (Context API or Redux)
For small to medium projects, Context API works great. Here’s a basic setup:
context/UserContext.jsx
                import { createContext, useContext, useState } from 'react';

                const UserContext = createContext();

                export const useUser = () => useContext(UserContext);

                export const UserProvider = ({ children }) => {
                const [user, setUser] = useState(null);

                return (
                    <UserContext.Provider value={{ user, setUser }}>
                    {children}
                    </UserContext.Provider>
                );
                };
Wrap <App /> with UserProvider in main.jsx.
Step 5: Backend Integration (If Applicable)
If you want to make this a full-stack ERP system, connect to a backend using Node.js + Express + MongoDB.
Sample Axios API Call:
                axios.get('https://yourdomain.com/api/employees')
                .then(res => console.log(res.data))
                .catch(err => console.error(err));
Use REST APIs for CRUD operations on each module (Employee, Inventory, etc.).
Step 6: Authentication & Role-Based Access
Use React Router with role-checking logic.
utils/PrivateRoute.jsx
                import { Navigate } from 'react-router-dom';
                import { useUser } from '../context/UserContext';

                const PrivateRoute = ({ children, role }) => {
                const { user } = useUser();
                if (!user || user.role !== role) return <Navigate to="/login" />;
                return children;
                };

                export default PrivateRoute;
Apply this to admin-only routes for your ERP modules.
Step 7: UI Polishing and Responsive Design
Use TailwindCSS, Flexbox, and Grid to ensure your ERP UI is fully responsive.
Example:
                <div className="grid grid-cols-1 md:grid-cols-2 lg:grid-cols-3 gap-6">
                {/* ERP Cards or Module Boxes */}
                </div>
Ensure:
- Dashboard scales on tablets & mobiles.
- Forms and tables look clean.
- Dark mode support (optional).
Explore the full GitHub Code to Create an ERP System Using ReactJS.
What Are the Common Issues & Troubleshooting Tips?
Even experienced developers run into challenges while building a full ERP React project. Here are some of the most common issues and how to solve them:
- Build Errors: If you’re using multiple packages, make sure your dependencies are compatible and updated. React version mismatches can often cause build issues.
- Component Structure Confusion: ERP systems require a clean folder structure. Separate your modules (HR, Inventory, etc.) into their components and containers for better maintainability.
- Authentication & Routing Fixes: Use libraries like React Router and implement role-based access to secure module-level routes. Many developers face issues with private routing in admin dashboards.
With this ReactJS ERP tutorial, you can avoid unnecessary headaches and build faster.
Why Choose Seven Square to Build Your ERP System in ReactJS?
At Seven Square, we specialize in building modern, scalable, and fully customized ERP systems using ReactJS.
Whether you’re a startup, SME, or enterprise, our expert developers can help you turn complex business processes into a clean & responsive web ERP application.
Here’s why developers and business owners trust us to build their ReactJS ERP applications:
- We have a proven track record of building custom ERP systems in ReactJS for clients across industries like retail, logistics, manufacturing, and services.
- Our team builds clean, modular, and scalable React ERP dashboards using the latest UI libraries and state management tools.
- We don’t stop at the front end; we deliver full-stack ERP projects with Node.js, Express, MongoDB, and REST APIs for complete backend integration.
- Secure user authentication, role-based access, and real-time data handling are built in.
- We offer post-launch support, upgrades, and module additions, so your ERP grows with your business.
Ready to build your custom ERP application in ReactJS? Contact Us Today!
Why Build an ERP System in ReactJS?
Still wondering why ReactJS for ERP systems?
Here’s why React is trusted by thousands of developers and SaaS businesses:
- Customization Potential: Easily modify modules or add new features tailored to business needs.
- Developer-Friendly Environment: The React ecosystem is rich in tools, libraries, and community support to make it ideal for rapid ERP development.
- Real-World Applications: Freelancers, startups, and enterprises can all benefit from building or using a custom ERP in React. You can offer this as a SaaS or build it for internal teams.
ReactJS helps you to build modern, responsive, and business-centric ERP systems fast.
FAQs
- An ERP system in ReactJS is a web-based application built using React that integrates core business processes like HR, inventory, CRM, and accounting into one responsive platform.
- It works using reusable components, efficient state management, and often connects to a backend (Node.js + MongoDB) for real-time data handling.
- A typical ReactJS ERP system includes:
- Inventory Management
- Employee Management
- CRM/Client Records
- Accounting & Reports
- Role-based access control
- Responsive dashboard UI
- API integration for full-stack ERP functionality
- Yes, in this blog, you’ll find working code examples to help you build a custom ERP dashboard in ReactJS from scratch.
- We also included a link to a complete project on GitHub for hands-on learning and quick implementation.
- You can use React Context API for small to mid-level apps or Redux for larger ERP systems.
- Both allow you to manage user data, module state, and permissions across the application effectively.