Looking to add interactive, high-performance maps to your Flutter app?
This Mapbox Flutter integration tutorial is your complete guide.
Whether you’re a developer building a ride-sharing app or a business owner creating a logistics dashboard.
Mapbox offers an advanced, flexible solution for embedding stunning maps.
Unlike Google Maps, Mapbox gives you more control over styling, offline capabilities, and data visualization.
Many developers now prefer Mapbox vs Google Maps in Flutter because of its customizability and better developer support through the Mapbox Maps SDK Flutter.
In this blog, you’ll learn:
- A step-by-step guide to integrating Mapbox into your Flutter project.
- How to display maps, add custom markers, and track user location.
- Get access to the full Mapbox Flutter source code and GitHub repository.
If you’re searching for a complete Mapbox Flutter tutorial, you’re in the right place.
Why Use Mapbox in Flutter?
So, why use Mapbox in Flutter when Google Maps already exists?
Here’s why Flutter developers and businesses are switching to Mapbox Maps SDK Flutter:
- Custom Styling: With Mapbox Studio, you can create beautiful custom map themes to match your brand.
- Offline Maps: Allow users to access maps even without an internet connection, great for travel, delivery, or rural use cases.
- Real-Time Data & Interactivity: Render real-time routes, locations, or data points with ease.
- Performance: Optimized for performance, especially when dealing with large datasets or animations.
Compared to Google Maps, Mapbox for Flutter offers much more freedom and flexibility.
While Google Maps is popular, Mapbox vs Google Maps for Flutter favors Mapbox in terms of customization and control over UX/UI.
What Do You Need to Integrate Mapbox in Flutter?
Before we explore the code, make sure you have these ready for your Flutter Mapbox setup:
Tools & Setup Required:
- Flutter SDK (v3.10+ recommended)
- Android Studio or VS Code with Flutter plugin
- A physical device or emulator (iOS/Android)
Get Your Free Mapbox Access Token:
To get started with Mapbox access token Flutter, follow these steps:
- Go to Mapbox.com and sign up for a free account.
- Navigate to your account dashboard.
- Copy your default public access token.
Install Mapbox SDK in Flutter:
Add the following dependency to your pubspec.yaml:
mapbox_maps_flutter: ^latest_version
Run flutter pub get to install the Mapbox Flutter SDK, and you’re ready to begin integration.
Step-by-Step Guide to Integrate Mapbox in Flutter

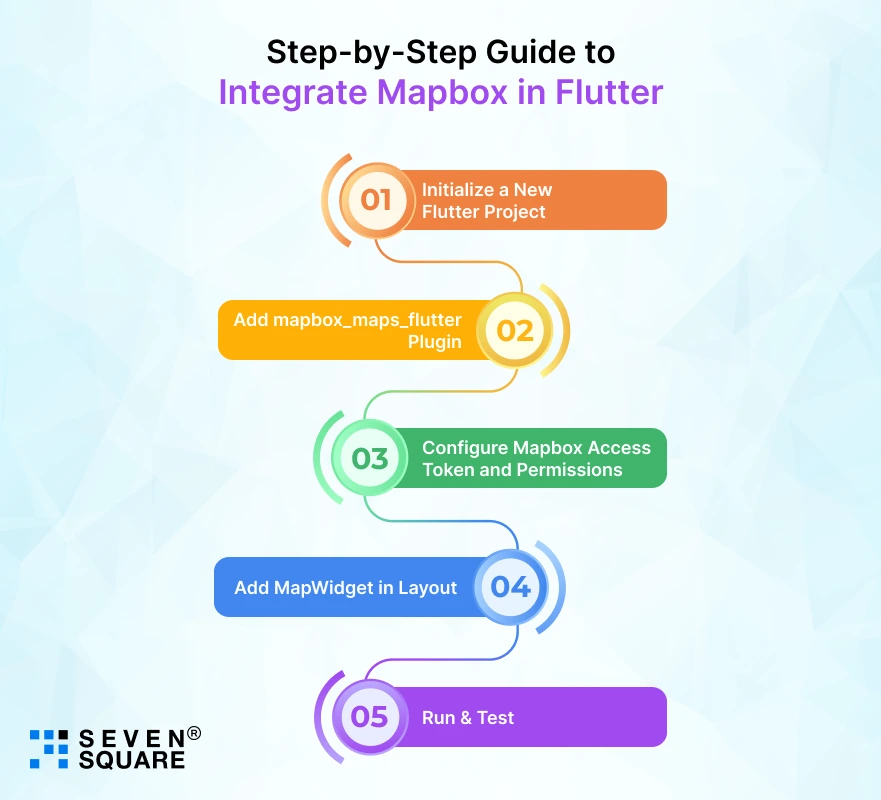
If you’re wondering how to integrate Mapbox in Flutter, follow this easy, step-by-step tutorial to add Mapbox to your Flutter app in minutes.
Step 1: Initialize a New Flutter Project
                flutter create mapbox_flutter_demo
                cd mapbox_flutter_demo
Step 2: Add mapbox_maps_flutter Plugin
Open your pubspec.yaml and add:
dependencies:
flutter:
sdk: flutter
mapbox_maps_flutter: ^0.4.0 # Check latest version
Then run:
flutter pub get
Step 3: Configure Mapbox Access Token and Permissions
Android (AndroidManifest.xml)
                <uses-permission android:name="android.permission.INTERNET"/>
                <application>
                  <meta-data
                  android:name="com.mapbox.token"
                    android:value="YOUR_MAPBOX_ACCESS_TOKEN"/>
                </application>
iOS (Info.plist)
                <key>io.flutter.embedded_views_preview</key>
                <true/>
                <key>MBXAccessToken</key>
                <string>YOUR_MAPBOX_ACCESS_TOKEN</string>
Step 4: Add MapWidget in Layout
In your main.dart file:
                import 'package:flutter/material.dart';
                import 'package:mapbox_maps_flutter/mapbox_maps_flutter.dart';

                void main() {
                  runApp(const MyApp());
                }

                class MyApp extends StatelessWidget {
                  const MyApp({super.key});

                  @override
                  Widget build(BuildContext context) {
                  return const MaterialApp(
                    home: MapPage(),
                  );
                  }
                }

                class MapPage extends StatelessWidget {
                  const MapPage({super.key});

                  @override
                  Widget build(BuildContext context) {
                  return Scaffold(
                    appBar: AppBar(title: const Text("Mapbox in Flutter")),
                    body: MapWidget(
                      resourceOptions: ResourceOptions(accessToken: 'YOUR_MAPBOX_ACCESS_TOKEN'),
                      cameraOptions: CameraOptions(
                        center: Point(coordinates: Position(-122.5194, 37.7749)).toJson(),
                        zoom: 10.0,
                      ),
                    ),
                  );
                  }
                }
Step 5: Run & Test
Now launch your app:
flutter run
You should see a live Mapbox map rendering in your Flutter app! This Flutter Mapbox integration tutorial gives you a functional setup you can build on.
We’ve uploaded the Mapbox Flutter full project on GitHub.
How to Add Custom Markers, Styles & Layers?
Adding custom icons or branding to your maps? Let’s improve the UI with Flutter Mapbox custom markers, themes, and layers.
Add a Custom Marker
First, add an asset image in pubspec.yaml:
flutter:
assets:
– assets/marker.png
Then add marker code:
                mapboxMap.addImageFromAsset("custom-marker", "assets/marker.png");
                mapboxMap.style.addLayer(SymbolLayer(
                  SymbolLayerOptions(
                  sourceId: "composite",
                  iconImage: "custom-marker",
                  geometry: Point(coordinates: Position(-122.4194, 37.7749)),
                  iconSize: 1.5,
                  ),
                ));
Use Mapbox Studio for Custom Styling
- Visit https://studio.mapbox.com
- Create and publish a new custom style
- Use the new style URL in MapWidget:
styleUri: "mapbox://styles/your-style-id"
This way, you can apply Mapbox map styles in Flutter to match your brand or UI theme.
Add Layers with Mapbox GL
Use built-in vector or raster tile layers to control overlays, shapes, and datasets with full flexibility.
This Mapbox Flutter marker example helps you create rich & branded map interfaces.
How to Track User Location on Map?
Want to show the user’s real-time location? Here’s how to enable Flutter Mapbox user location tracking.
Add Location Permissions
Android (AndroidManifest.xml)
                <uses-permission android:name="android.permission.ACCESS_FINE_LOCATION"/>
                <uses-permission android:name="android.permission.ACCESS_COARSE_LOCATION"/>
iOS (Info.plist)
                <key>NSLocationWhenInUseUsageDescription</key>
                <string>This app needs access to your location.</string>
Enable Location in Flutter
Use the location package:
location: ^5.0.0
Sample Code:
                import 'package:location/location.dart';

                Location location = Location();

                void initUserLocation() async {
                  bool serviceEnabled = await location.serviceEnabled();
                  if (!serviceEnabled) {
                  serviceEnabled = await location.requestService();
                  }

                  PermissionStatus permissionGranted = await location.hasPermission();
                  if (permissionGranted == PermissionStatus.denied) {
                  permissionGranted = await location.requestPermission();
                  }

                  LocationData userLocation = await location.getLocation();
                  print("User Location: ${userLocation.latitude}, ${userLocation.longitude}");
                }
Use the coordinates to set the map’s center dynamically and update as needed. This is the base of Mapbox live location in Flutter apps.
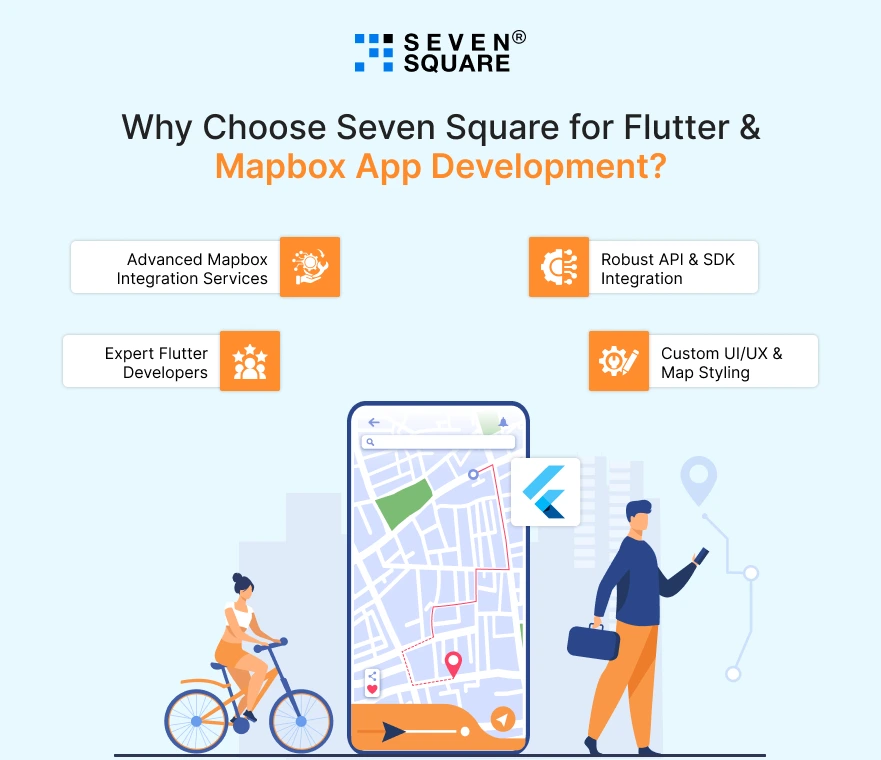
Why Choose Seven Square for Flutter & Mapbox App Development?

If you’re looking for a dependable Flutter app development company that can smoothly handle Mapbox integration and build scalable mobile apps, Seven Square is your go-to partner.
Here’s why businesses, startups, and tech entrepreneurs trust us:
- Expert Flutter Developers: Our team specializes in Flutter mobile app development from MVPs to full-scale enterprise apps.
- Advanced Mapbox Integration Services: We help you integrate Mapbox in Flutter apps with custom styles, live tracking, and offline maps using the latest Mapbox Flutter SDK.
- Robust API & SDK Integration: We integrate third-party APIs like Mapbox, Google Maps, Firebase, Stripe, and others without breaking your existing architecture.
- Custom UI/UX & Map Styling: We design pixel-perfect UI with custom Mapbox map styles, themes, and user interaction features.
Want to have a Custom Flutter App? Contact Us Now!
What Are the Common Errors & How to Fix Them?
Even though Mapbox integration in Flutter is straightforward, you may hit a few bumps along the way.
Here are some of the most frequent Mapbox Flutter common issues and how to resolve them:
1. Map Not Showing in Flutter
- Problem: You’ve followed the setup, but the map doesn’t render.
- Fix: Make sure the access token is correct and permissions (location/internet) are properly set in AndroidManifest.xml and Info.plist.
2. Invalid API Key or Token Error
- Problem: “Unauthorized: No token provided” or “Token not valid.”
- Fix: Double-check your Mapbox access token for Flutter. Avoid using a secret token in public-facing apps.
3. Location Not Updating
- Problem: User location doesn’t appear or update in real time.
- Fix: Ensure location permissions are granted and device GPS is turned on. Use the geolocator or location plugin if needed.
These solutions will help you avoid major Mapbox integration errors and get your map working smoothly. Don’t let a simple mistake stop your app from reaching users.
FAQs
- Add mapbox_maps_flutter plugin, set your access token, configure Android/iOS files, and use MapWidget.
- Follow our complete Flutter Mapbox integration tutorial with full code and GitHub repository.
- Use mapbox_maps_flutter, the official plugin for Flutter.
- It supports custom markers, map styles, offline maps, and real-time location, which is ideal for modern Flutter apps using Mapbox.
- Mapbox offers better styling, offline maps, and real-time tracking.
- It’s more customizable than Google Maps for Flutter and ideal for unique, branded experiences in apps.
- Load marker images as assets and place them using SymbolLayer.
- Our Flutter Mapbox marker example shows exactly how to style and position custom icons on your map.