The demand for online job portals is increasing day by day. Platforms like Indeed, Naukri, and LinkedIn connect millions of job seekers and employers every day.
Businesses want smarter recruitment solutions, while candidates expect fast and secure platforms to apply for jobs.
This means there’s huge potential if you build a job portal in Django for your own startup or company.
But why choose Django? The answer is simple:
- Fast development: Django’s built-in tools let you create a job portal website in Django quickly without reinventing the wheel.
- Secure by default: Django has strong security features, protecting user data like resumes and job postings.
- Scalable for growth: Whether you’re serving 100 or 100,000 users, Django can handle it.
If you’re looking for a future-proof way to develop a professional job portal website in Django, this is the right time to get started.
Trying to learn to build a Job Portal Website in Django? This blog is for you, as we tried to explain the step-by-step process with code.
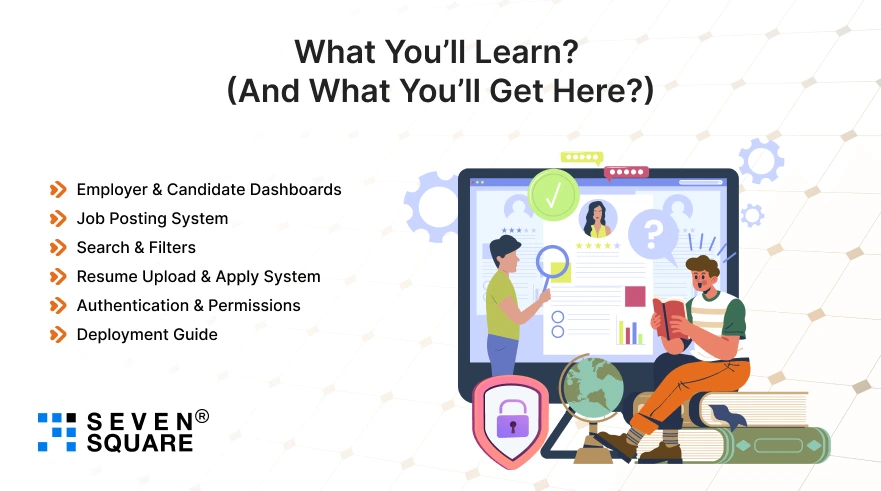
What You’ll Learn? (And What You’ll Get Here?)

You’ll get a complete Django job portal source code along with a GitHub link so you can clone, customize, and launch your own project instantly.
Here’s what you’ll build step by step:
- Employer & Candidate Dashboards: Separate portals for recruiters and job seekers.
- Job Posting System: Employers can add and manage job listings.
- Search & Filters: Candidates can find jobs by category, location, and keywords.
- Resume Upload & Apply System: A Simple process for candidates to apply directly.
- Authentication & Permissions: Secure login for both sides.
- Deployment Guide: Make your Django job portal live for real users.
You’ll have not just a tutorial but a full Django job portal GitHub project ready to run.
What Are the Common Mistakes to Avoid When Building a Django Job Portal?

Even experienced developers make mistakes while working on a job portal Django tutorial. Here are some of the risks you should avoid:
- Ignoring Security: Many forget to secure file uploads. If resumes are not protected, they can expose sensitive user data. Always use Django’s file handling and authentication properly.
- Poor Database Design: A weak model structure can slow down your portal. For example, mixing employer and candidate data in one table makes it harder to scale.
- Skipping Deployment Optimization: Running your site in debug mode or not setting up caching/CDN can hurt performance. Always optimize before you deploy your Django job portal.
Avoiding these job portal Django tutorial mistakes will save you time, money, and headaches in the long run.
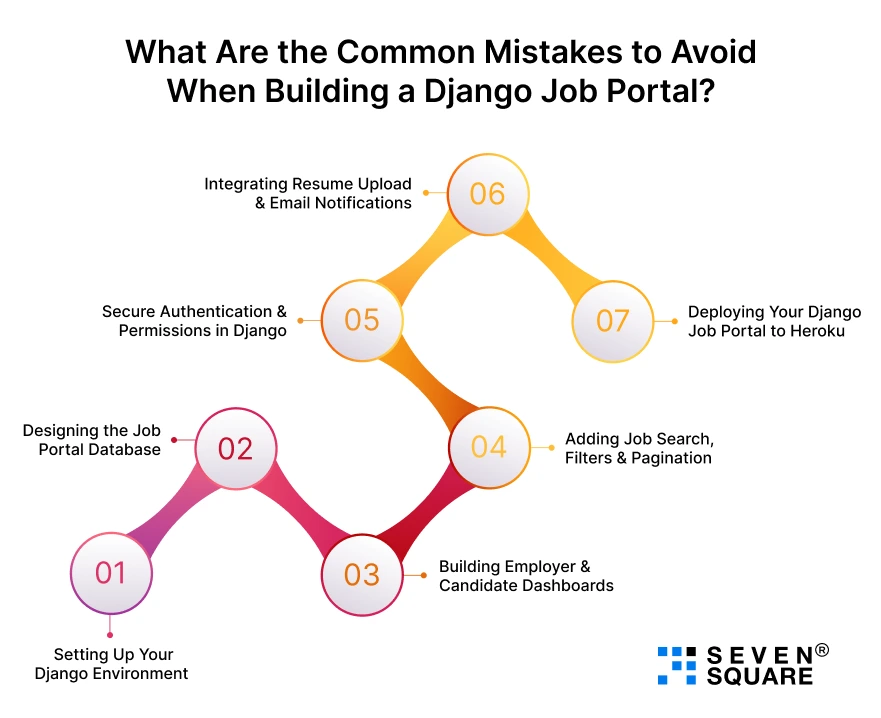
Step 1: Setting Up Your Django Environment
Set up the environment to build a job portal in Django. This ensures you have the right tools to run the job portal Django source code smoothly.
Install Virtual Environment & Django
            # Create virtual environment
            python -m venv venv

            # Activate environment
            # On Windows
            venv\Scripts\activate
            # On Mac/Linux
            source venv/bin/activate

            # Install Django and psycopg2 (for PostgreSQL)
            pip install django psycopg2-binary
Create Your First Django Project
            # Start a new Django project
            django-admin startproject jobportal

            cd jobportal

            # Run the development server
            python manage.py runserver
Now you have a running Django project that will soon turn into a professional job portal website.
Step 2: Designing the Job Portal Database (Models Explained Simply)
The heart of any Django recruitment system is its database models. We’ll create three main models:
- Employer: Companies posting jobs.
- Candidate: Job seekers applying for jobs.
- Job: Job postings linked to employers and candidates.
Example Models (jobportal/jobs/models.py)
           from django.db import models
           from django.contrib.auth.models import User

        class Employer(models.Model):
            user = models.OneToOneField(User, on_delete=models.CASCADE)
            company_name = models.CharField(max_length=255)
            website = models.URLField(blank=True)

            def __str__(self):
                return self.company_name

        class Candidate(models.Model):
            user = models.OneToOneField(User, on_delete=models.CASCADE)
            resume = models.FileField(upload_to="resumes/")

            def __str__(self):
                return self.user.username

        class Job(models.Model):
            employer = models.ForeignKey(Employer, on_delete=models.CASCADE)
            title = models.CharField(max_length=255)
            description = models.TextField()
            location = models.CharField(max_length=100)
            salary = models.DecimalField(max_digits=10, decimal_places=2)
            created_at = models.DateTimeField(auto_now_add=True)

            def __str__(self):
                return self.title
With these job portal Django models, we now have the foundation for employers, candidates, and job postings.
Step 3: Building Employer & Candidate Dashboards
A job portal website in Django needs separate dashboards for recruiters and job seekers.
- Employers can post jobs and see applicants.
- Candidates can browse jobs, upload resumes, and apply.
Employer Dashboard (jobs/views.py)
           from django.shortcuts import render
           from .models import Job

            def employer_dashboard(request):
                jobs = Job.objects.filter(employer=request.user.employer)
                return render(request, "employer_dashboard.html", {"jobs": jobs})
Candidate Dashboard (jobs/views.py)
           def candidate_dashboard(request):
            jobs = Job.objects.all()
            return render(request, "candidate_dashboard.html", {"jobs": jobs})
With these, you have a working employer and candidate dashboard in Django.
Step 4: Adding Job Search, Filters & Pagination (Real-World Features)
No Django job portal is complete without a search and filter system. Let’s add them:
Search & Filter (jobs/views.py)
           from django.core.paginator import Paginator

            def job_list(request):
                query = request.GET.get("q")
                jobs = Job.objects.all()

                if query:
                    jobs = jobs.filter(title__icontains=query)

                location = request.GET.get("location")
                if location:
                    jobs = jobs.filter(location__icontains=location)

                salary = request.GET.get("salary")
                if salary:
                    jobs = jobs.filter(salary__gte=salary)

                paginator = Paginator(jobs, 5)  # 5 jobs per page
                page = request.GET.get("page")
                jobs = paginator.get_page(page)

                return render(request, "job_list.html", {"jobs": jobs})
This gives you search bar integration, filters, and pagination, making your project feature-rich with real-world Django job portal features.
Step 5: Secure Authentication & Permissions in Django
Your job portal must differentiate between candidate login and employer login.
Role-Based Permissions (jobs/models.py)
           class Profile(models.Model):
            USER_TYPES = (
                ("employer", "Employer"),
                ("candidate", "Candidate"),
            )
            user = models.OneToOneField(User, on_delete=models.CASCADE)
            user_type = models.CharField(max_length=10, choices=USER_TYPES)
Restrict Access in Views (jobs/views.py)
           from django.contrib.auth.decorators import login_required, user_passes_test

            def is_employer(user):
                return hasattr(user, 'profile') and user.profile.user_type == "employer"

            @login_required
            @user_passes_test(is_employer)
            def employer_only_view(request):
                return render(request, "employer_only.html")
This ensures secure Django job portal authentication by separating candidate and employer permissions.
Step 6: Integrating Resume Upload & Email Notifications
Let’s add two critical features:
- Resume upload (already in Candidate model).
- Email notifications when someone applies.
Application Model (jobs/models.py)
           class Application(models.Model):
            job = models.ForeignKey(Job, on_delete=models.CASCADE)
            candidate = models.ForeignKey(Candidate, on_delete=models.CASCADE)
            cover_letter = models.TextField(blank=True)
            applied_at = models.DateTimeField(auto_now_add=True)
Sending Email (jobs/views.py)
           from django.core.mail import send_mail

            def apply_job(request, job_id):
                job = Job.objects.get(id=job_id)
                candidate = request.user.candidate
                Application.objects.create(job=job, candidate=candidate)

                # Send email to employer
                send_mail(
                    subject="New Job Application",
                    message=f"{candidate.user.username} has applied for {job.title}.",
                    from_email="noreply@jobportal.com",
                    recipient_list=[job.employer.user.email],
                )

                return render(request, "apply_success.html")
This makes your Django job application system complete with resume upload + email notifications.
Step 7: Deploying Your Django Job Portal to Heroku
Building locally is great, but to make your portal live, you need deployment.
Why Deploy?
Deployment makes your portal accessible to real users, employers, and candidates, instead of just your local machine.
Steps to Deploy to Heroku
           # Install Gunicorn & dj-database-url
            pip install gunicorn dj-database-url whitenoise

            # Create Procfile
            echo "web: gunicorn jobportal.wsgi" > Procfile

            # Initialize Git and push to Heroku
            git init
            heroku create jobportal-app
            git add .
            git commit -m "Deploy Django Job Portal"
            git push heroku master

            # Run migrations
            heroku run python manage.py migrate
You’ve now deployed your Django job portal and can share it with the world.
By using PostgreSQL in production, you can build a scalable job portal with Django and PostgreSQL that supports thousands of users.
Here’s the Complete GitHub Code to Build a Job Portal Website in Django.
Your Vision & Our Django Expertise
When it comes to building a job portal website in Django, we stand out with proven expertise in delivering scalable solutions for businesses & startups.
- From setting up the environment to deployment, we build complete job portal Django solutions tailored to your needs.
- We use Django + PostgreSQL to create scalable job portals that handle large volumes of jobs and applications.
- Smooth navigation for both employers and candidates, making job posting and applications effortless.
- Role-based access for employers, recruiters, and candidates with safe login systems.
- Resume parsing, email notifications, third-party APIs, and even payment gateways for premium job listings.
Want a Custom Django Solution? Contact Us Now!
Launch Your Professional Django Job Portal
Now you can build a job portal website in Django with real features like dashboards, search, job posting, and resume uploads.
You also got access to the Django job portal source code on GitHub, so you don’t have to start from scratch. You can customize it further with features like:
- Premium listings with payments.
- AI-based job matching.
- Advanced analytics for employers.
FAQs
- For small projects, SQLite is fine.
- But for a scalable Django job portal, we suggest PostgreSQL because it handles large job listings, multiple users, & complex queries better.
- You can integrate a job search bar and filters using Django queries. Filters like category, location, and salary make the portal user-friendly.
- Our Django job portal search filter tutorial in this blog shows you how to implement it step by step.
- Use Django’s built-in authentication system with role-based permissions. Create separate logins for employers and candidates.
- Always use HTTPS and strong password hashing for a secure Django job portal authentication system.
- Yes, Django supports file uploads like PDF and DOCX.
- You can allow candidates to upload resumes while applying. It is important for any Django job application system.