Flutter has firmly established itself as the go-to framework for cross-platform app development.
To build apps for both Android and iOS using a single codebase saves time, effort, and budget.
But even with Flutter’s power, creating a beautiful UI from scratch can still be time-consuming.
That’s where Flutter UI templates come in.
Instead of designing every screen manually, you can use pre-built, ready-to-use Flutter UI components to kickstart your app.
These open source Flutter templates include everything from login pages and dashboards to full e-commerce interfaces.
They’re professionally designed, easy to customize, and best of all many of them are completely free.
In this blog, we’ll share examples of the best Flutter UI templates that you can fork today from GitHub.
There are many open-source UI kits trusted by developers and loved by the community.
Whether you’re building an MVP for a pitch, working on a side project, or developing your next business app, these Flutter UI examples will save you hours of development time.
So let’s explore the top Flutter templates on GitHub that will help you build faster and smarter.
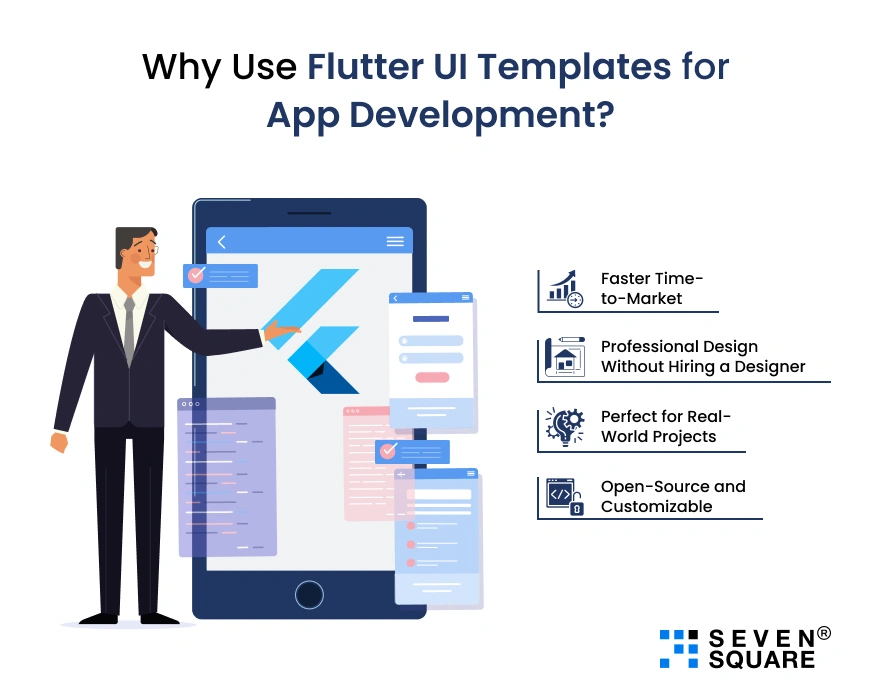
Why Use Flutter UI Templates for App Development?

Using Flutter UI templates is one of the smartest ways to speed up Flutter app development in 2025.
Here’s why thousands of developers and businesses depend upon them:
1. Faster Time-to-Market
- With pre-built UI components, you don’t have to start from scratch.
- You can launch your app in days instead of weeks, making it perfect for MVPs and quick client deliveries.
2. Professional Design Without Hiring a Designer
- Most Flutter UI templates are created by experienced designers and developers.
- This means you get modern, responsive designs that look great on both Android and iOS without spending extra on UI/UX services.
3. Perfect for Real-World Projects
- These templates are not just for learning, they’re production-ready.
- From Flutter UI examples for e-commerce and fintech to task managers and fitness apps, you can easily plug them into your live project.
4. Open-Source and Customizable
- Many of the best Flutter UI kits are available on GitHub, making them easy to fork, modify, and scale.
- You can add new features, change the theme, or integrate APIs without starting from zero.
Whether you’re building a simple mobile app or a feature-rich business platform, these Flutter templates help you develop faster, save money, and focus on what matters, your app’s functionality and growth.
Unique Flutter UI Template (Sample with Code)
Let’s go through a simple but powerful Flutter UI template: a Login Screen + Dashboard Screen layout.
This free Flutter UI template is responsive, forkable, and perfect for modern apps like CRMs, finance trackers, or admin dashboards.
You can name it:
SimpleDash – Clean Login + Dashboard Flutter UI Kit
Key Features:
- Clean and modern login screen
- Dashboard with app cards and icons
- Fully responsive layout
- Organized code structure
- Easy to customize and extend
Folder Structure:
├── lib/
│ ├── screens/
│ │ ├── login_screen.dart
│ │ └── dashboard_screen.dart
│ ├── widgets/
│ │ └── app_card.dart
│ └── main.dart
main.dart
       import 'package:flutter/material.dart';
        import 'screens/login_screen.dart';

        void main() => runApp(SimpleDashApp());

        class SimpleDashApp extends StatelessWidget {
          @override
          Widget build(BuildContext context) {
          return MaterialApp(
            title: 'SimpleDash UI',
            theme: ThemeData(primarySwatch: Colors.indigo),
            home: LoginScreen(),
            debugShowCheckedModeBanner: false,
          );
          }
        }
Copied!
login_screen.dart
       import 'package:flutter/material.dart';
        import 'dashboard_screen.dart';

        class LoginScreen extends StatelessWidget {
          final TextEditingController emailController = TextEditingController();
          final TextEditingController passwordController = TextEditingController();

          void login(BuildContext context) {
          Navigator.push(
            context,
            MaterialPageRoute(builder: (context) => DashboardScreen()),
          );
          }
          @override
          Widget build(BuildContext context) {
          return Scaffold(
            backgroundColor: Colors.white,
            body: Padding(
              padding: const EdgeInsets.all(24.0),
              child: Column(
                mainAxisAlignment: MainAxisAlignment.center,
                children: [
                  Text("Welcome Back!", style: TextStyle(fontSize: 28, fontWeight: FontWeight.bold)),
                  SizedBox(height: 40),
                  TextField(
                    controller: emailController,
                    decoration: InputDecoration(labelText: 'Email', border: OutlineInputBorder()),
                  ),
                  SizedBox(height: 20),
                  TextField(
                    controller: passwordController,
                    obscureText: true,
                    decoration: InputDecoration(labelText: 'Password', border: OutlineInputBorder()),
                  ),
                SizedBox(height: 30),
                  ElevatedButton(
                    onPressed: () => login(context),
                    child: Text("Login"),
                    style: ElevatedButton.styleFrom(minimumSize: Size.fromHeight(50)),
                  )
                ],
              ),
            ),
          );
        }
      }
Copied!
dashboard_screen.dart
          import 'package:flutter/material.dart';
            import '../widgets/app_card.dart';

            class DashboardScreen extends StatelessWidget {
              final List> cards = [
              {'title': 'Analytics', 'icon': Icons.bar_chart, 'color': Colors.orange},
              {'title': 'Users', 'icon': Icons.people, 'color': Colors.teal},
              {'title': 'Messages', 'icon': Icons.message, 'color': Colors.purple},
              ];

              @override
              Widget build(BuildContext context) {
              return Scaffold(
                  appBar: AppBar(title: Text('Dashboard')),
                body: Padding(
                  padding: const EdgeInsets.all(16.0),
                  child: GridView.count(
                    crossAxisCount: 2,
                    children: cards.map((card) => AppCard(data: card)).toList(),
                  ),
                ),
              );
              }
            }
Copied!
app_card.dart (Reusable UI Component)
          import 'package:flutter/material.dart';

          class AppCard extends StatelessWidget {
            final Map data;

            const AppCard({Key? key, required this.data}) : super(key: key);

            @override
            Widget build(BuildContext context) {
            return Card(
              elevation: 4,
              color: data['color'],
              shape: RoundedRectangleBorder(borderRadius: BorderRadius.circular(16)),
              child: Center(
                child: Column(
                  mainAxisSize: MainAxisSize.min,
                  children: [
                    Icon(data['icon'], size: 40, color: Colors.white),
                    SizedBox(height: 10),
                    Text(data['title'], style: TextStyle(color: Colors.white, fontSize: 18)),
                  ],
                ),
              ),
            );
            }
          }
Copied!
Explore the best Flutter UI Template that we created.
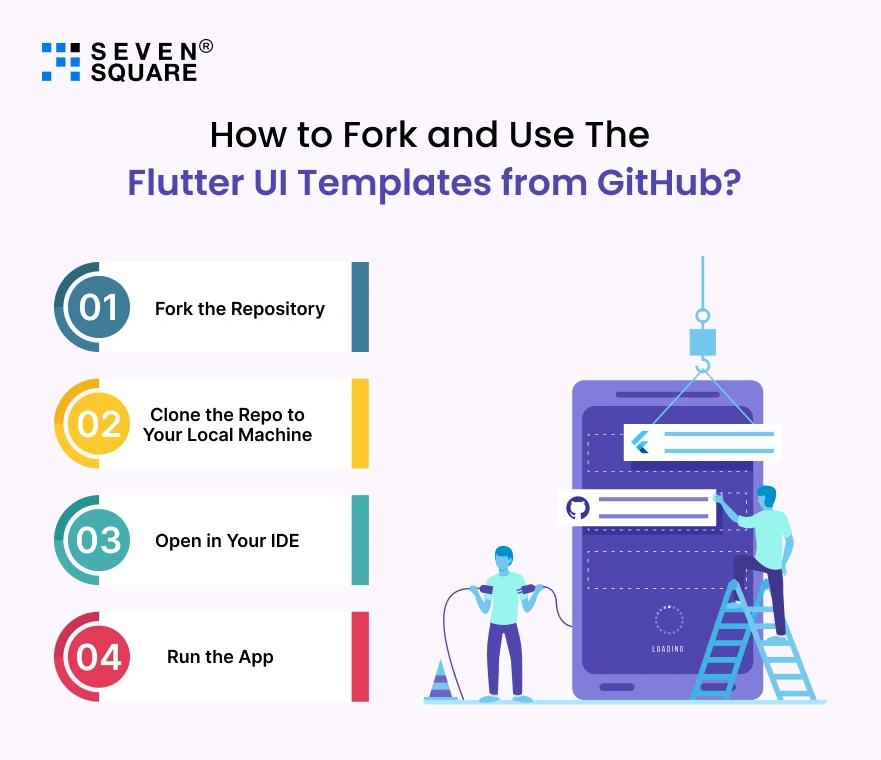
How to Fork and Use The Flutter UI Templates from GitHub?

Did you find a Flutter UI kit you love? Great!
Now let’s go step-by-step on how to fork Flutter UI templates from GitHub and run them in your own Flutter project.
1. Fork the Repository
- Go to the GitHub repo of the Flutter template you want.
- Click the “Fork” button (top right corner) to copy the project to your GitHub account.
2. Clone the Repo to Your Local Machine
git clone https://github.com/your-username/flutter-ui-template.git
cd flutter-ui-template
3. Open in Your IDE (Android Studio, VS Code)
- Launch your preferred IDE.
- Open the cloned folder.
- Make sure your Flutter SDK is installed and configured.
4. Run the App
flutter pub get
flutter run
And just like that, you have a beautiful Flutter template from GitHub running on your device or emulator.
Tips to Customize Flutter UI Templates for Your App
Using a Flutter UI template is just the start.
Let’s now talk about how to make it truly your own and ready for production.
Whether you’re building an MVP or a fully-featured app, here’s how to customize Flutter UI templates like a pro.
1. Theme Customization
- Change colors, fonts, and icons in ThemeData.
          theme: ThemeData(
            primarySwatch: Colors.teal,
            fontFamily: 'Roboto',
          )
Copied!
- Update global styles for buttons, text fields, etc. This ensures a consistent brand identity across the app.
2. Add New Screens or Modules
- Create new screens inside the screens/ folder.
- Use Navigator to move between screens:
Navigator.push(context, MaterialPageRoute(builder: (context) => NewScreen()));
Copied!
- Pro Tip: Use reusable components to avoid code duplication.
3. Integrate with Firebase or Backend APIs
- Most Flutter templates GitHub projects are front-end only. To make it real-world ready:
- Use Firebase Auth for login systems
- Add Firestore/Realtime DB for dynamic content
- Connect to your REST or GraphQL API using http or dio packages
final response = await http.get(Uri.parse(‘https://yourapi.com/data’));
4. Best Practices for Clean Code & Performance
- Organize your code with folders like models/, services/, widgets/
- Use State Management (e.g., Provider, Riverpod, BLoC) for large apps
- Avoid unnecessary rebuilds for better performance
Using and customizing free Flutter UI templates from GitHub can save you weeks of design and development.
Whether you’re a startup founder, a solo dev, or part of a team, starting with the best Flutter UI kits gives you a major head start.
Want a fully customized Flutter App? Contact Us Today!
FAQs
- Flutter UI templates are pre-designed sets of widgets and layouts built using Flutter.
- They help developers quickly launch apps without designing UIs from scratch.
- You can find both free and premium Flutter UI templates for dashboards, eCommerce, login pages, and more.
- Yes, most open-source Flutter UI kits on GitHub come with permissive licenses like MIT or BSD.
- Always check the license file in the repository before using it in commercial apps.
- You can customize Flutter UI templates by changing themes in ThemeData, editing widgets, adding screens, and integrating APIs.
- Many Flutter UI kits are built modularly, so adding your logic or backend is simple.
- No, most Flutter UI templates GitHub projects only include the frontend (UI).
- You’ll need to connect your backend (Firebase, REST API, etc.) for dynamic data handling.