Have you ever wondered how apps like Snapchat, Instagram, or TikTok add real-time face AR filters, beauty effects, and fun stickers on videos?
Now you can build the same live video filters in Flutter using Google ML Kit, Mediapipe, ARCore, and OpenCV.
If you are adding face detection in Flutter with AR overlays, then make your app more engaging and future-ready.
In this blog, we’ll explore how to create Snapchat-style face AR filters in Flutter.
From setting up a Flutter project with Mediapipe face detection to overlaying face mesh landmarks (eyes, nose, mouth) with custom effects like masks, glasses, and stickers.
You’ll also learn how to apply beauty filters, live color effects, and video filters in Flutter for a professional AR experience.
Let’s start building live AR face filters in Flutter that run smoothly at 60fps and bring the magic of AR right into your app.
Why Face AR in Flutter Is the Next Big Thing?
Snapchat filters in your Flutter app? Yes, possible!
Over the past few years, Face AR technology has moved from being a fun gimmick to a must-have feature in modern apps.
From Snapchat style filters in Flutter apps to Instagram AR effects, users now expect interactive and entertaining camera experiences everywhere.
This trend is not limited to social apps. Flutter live video filters and Flutter Face AR are being used in:
- E-commerce for AR try-ons (glasses, hats, makeup).
- Healthcare for facial analysis and liveness detection.
- Entertainment apps for real-time effects and streaming.
By the end, you’ll have a working demo similar to Snapchat and Instagram filters, built entirely in Flutter.
What Are the Prerequisites Before You Start?
Before we get into coding, make sure your setup is ready:
- Flutter Setup: Install the latest Flutter SDK and configure it for Android and iOS.
- Dependencies: You’ll need a few plugins/packages:
- Camera: for accessing the live camera feed.
- google_ml_kit or MediaPipe: For face detection and landmarks.
- arcore_flutter_plugin (optional, for Android AR features).
- Device Requirements:
- A real device is recommended because emulators don’t support live camera + AR features well.
- Works on both Android and iOS with minor configuration differences.
By the end of setup, you’ll be ready to implement Flutter camera plugin face detection with Google ML Kit face detection in Flutter for real-time tracking.
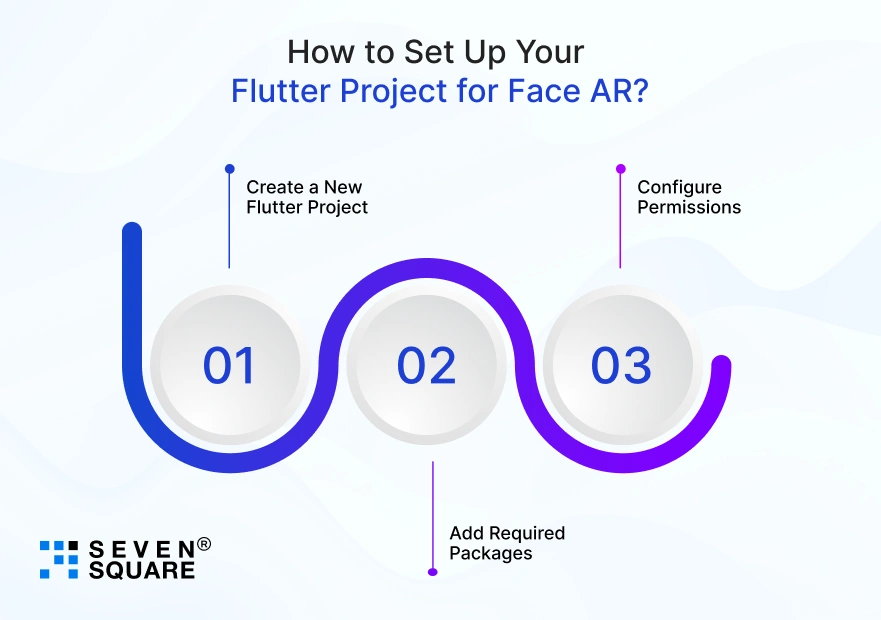
How to Set Up Your Flutter Project for Face AR?

Before we can bring Snapchat-style filters into Flutter, let’s set up the project properly.
Step 1: Create a New Flutter Project
Run the following command in your terminal:
        flutter create face_ar_filters
        cd face_ar_filters
Step 2: Add Required Packages
Add these dependencies in pubspec.yaml:
        dependencies:
        flutter:
          sdk: flutter
        camera: ^0.11.0+1
        google_mlkit_face_detection: ^0.11.0
        arcore_flutter_plugin: ^0.1.0 # Optional for ARCore
        flutter_opencv: ^0.0.5 # Optional for filters
- Camera: For real-time camera preview.
- google_mlkit_face_detection: For Flutter ML Kit video stream-based face detection.
- arcore_flutter_plugin: For Flutter ARCore Faces API (Android AR support).
- flutter_opencv: For applying filters.
Step 3: Configure Permissions (Android & iOS)
Android: Add this to AndroidManifest.xml:
        <uses-permission android:name="android.permission.CAMERA"/>
        <uses-permission android:name="android.permission.INTERNET"/>
iOS: Add this to Info.plist:
        <key>NSCameraUsageDescription</key>
        <string>This app needs camera access for AR filters</string>
Now you’re ready to start implementing Flutter MediaPipe face detection and Flutter ML Kit video stream face tracking.
How to Detect the Face in Real-Time?
To build AR filters, we first need to detect the user’s face in real time.
- Face landmarks are specific points (eyes, nose, mouth, ears) detected on a face.
- Face mesh (468 points) gives a detailed 3D mapping of the face for accurate AR effects.
We’ll use Google ML Kit Face Detection in Flutter to achieve this.
Code: Face Detection + Camera Stream
        import 'package:flutter/material.dart';
        import 'package:camera/camera.dart';
        import 'package:google_mlkit_face_detection/google_mlkit_face_detection.dart';

        class FaceDetectionPage extends StatefulWidget {
          @override
          _FaceDetectionPageState createState() => _FaceDetectionPageState();
        }

        class _FaceDetectionPageState extends State<FaceDetectionPage> {
          late CameraController _cameraController;
          late FaceDetector _faceDetector;
          bool _isDetecting = false;
          List<Face> _faces = [];

          @override
          void initState() {
          super.initState();
          _initCamera();
          _faceDetector = FaceDetector(
            options: FaceDetectorOptions(
              enableContours: true,
              enableLandmarks: true,
            ),
          );
          }

          Future<void> _initCamera() async {
          final cameras = await availableCameras();
          _cameraController =
              CameraController(cameras.first, ResolutionPreset.medium);

          await _cameraController.initialize();
            _cameraController.startImageStream((CameraImage image) async {
            if (_isDetecting) return;
            _isDetecting = true;

            final WriteBuffer allBytes = WriteBuffer();
            for (var plane in image.planes) {
              allBytes.putUint8List(plane.bytes);
            }
            final bytes = allBytes.done().buffer.asUint8List();

            final Size imageSize =
                Size(image.width.toDouble(), image.height.toDouble());

            final camera = cameras.first;
            final imageRotation =
                InputImageRotationValue.fromRawValue(camera.sensorOrientation) ??
                    InputImageRotation.rotation0deg;

            final inputImageFormat =
                  InputImageFormatValue.fromRawValue(image.format.raw) ??
                    InputImageFormat.nv21;

            final planeData = image.planes.map(
              (Plane plane) {
                return InputImagePlaneMetadata(
                  bytesPerRow: plane.bytesPerRow,
                  height: plane.height,
                  width: plane.width,
                );
              },
            ).toList();

            final inputImageData = InputImageData(
              size: imageSize,
              imageRotation: imageRotation,
              inputImageFormat: inputImageFormat,
              planeData: planeData,
            );

            final inputImage =
                InputImage.fromBytes(bytes: bytes, inputImageData: inputImageData);

            final faces = await _faceDetector.processImage(inputImage);
            setState(() => _faces = faces);

            _isDetecting = false;
          });
          setState(() {});
          }

          @override
          void dispose() {
          _cameraController.dispose();
          _faceDetector.close();
          super.dispose();
          }

          @override
          Widget build(BuildContext context) {
          return Scaffold(
            body: _cameraController.value.isInitialized
                ? Stack(
                    children: [
                        CameraPreview(_cameraController),
                      CustomPaint(
                        painter: FacePainter(_faces),
                      ),
                    ],
                  )
                : Center(child: CircularProgressIndicator()),
          );
          }
        }

        class FacePainter extends CustomPainter {
          final List<Face> faces;
          FacePainter(this.faces);

          @override
          void paint(Canvas canvas, Size size) {
          final paint = Paint()
            ..color = Colors.green
            ..style = PaintingStyle.stroke
            ..strokeWidth = 2.0;

          for (var face in faces) {
            canvas.drawRect(face.boundingBox, paint);
          }
          }

          @override
          bool shouldRepaint(covariant CustomPainter oldDelegate) => true;
        }
This code captures the real-time camera stream, applies Flutter face detection in real time, and draws bounding boxes.
How to Overlay Filters on the Face?
Now that we can detect the face, let’s overlay fun AR filters.
- Use face mesh landmarks to position objects.
- Example: Snapchat-style dog ears filter.
Code: AR Face Overlay Flutter Example
        class FilterPainter extends CustomPainter {
        final List<Face> faces;
        FilterPainter(this.faces);

        @override
        void paint(Canvas canvas, Size size) {
        final paint = Paint();

        for (var face in faces) {
          // Example: Draw glasses
          final leftEye = face.landmarks[FaceLandmarkType.leftEye];
          final rightEye = face.landmarks[FaceLandmarkType.rightEye];

          if (leftEye != null && rightEye != null) {
            final eyeRect = Rect.fromPoints(
              Offset(leftEye.position.x.toDouble(), leftEye.position.y.toDouble()),
                Offset(rightEye.position.x.toDouble(), rightEye.position.y.toDouble()),
            );
            paint.color = Colors.blue.withOpacity(0.5);
            canvas.drawRect(eyeRect.inflate(20), paint);
          }
        }
        }

        @override
        bool shouldRepaint(covariant CustomPainter oldDelegate) => true;
      }
Here’s the full working Flutter Face AR filter code. (Setup + Detection + Overlay)
Adding Live Video Filters & Effects
Besides AR stickers, you can add beauty filters and color effects:
- Beauty filters: Skin smoothing, brightness.
- Color filters: Grayscale, sepia, etc.
- AR overlays: Hats, masks, 3D effects.
For this, we can use Flutter OpenCV filters or third-party SDKs like Flutter Beauty Filter SDK.
Example: Apply a grayscale filter before displaying the preview.
        // Example pseudo code for OpenCV integration
        Mat frame = Imgcodecs.imdecode(inputImage, Imgcodecs.IMREAD_COLOR);
        Imgproc.cvtColor(frame, frame, Imgproc.COLOR_BGR2GRAY);
Why Choose Seven Square for Flutter Face AR App Development?

When it comes to building live video filters and Face AR in Flutter, Seven Square stands out as a trusted development partner. Here’s why businesses choose us:
- Expert Flutter & AR Development: Deep expertise in Flutter app development, AR/VR solutions, and real-time video processing.
- Modern Tech Stack: Hands-on experience with Google ML Kit, Mediapipe, ARCore, and OpenCV for robust face detection and AR filters.
- High Performance: We build apps that run buttery-smooth at 60fps, optimized for both Android and iOS devices.
- Scalable Solutions: From Snapchat-like AR apps to custom face mesh filters, we ensure your Flutter AR apps are built to scale.
- Quality & Speed: We deliver with quick timelines, clear communication, and uncompromising quality standards.
Looking to Develop Custom AR Filters in Flutter? Contact Us Now!
What Are the Advanced Extensions to Build Live Face AR Filters? (Go Beyond Snapchat)
Once you have the basics of Flutter AR filters running, you can take it further:
- AR Try-Ons for E-Commerce: Let users try on glasses, hats, or makeup in real time. Using Flutter AR glasses try-on, you can give customers a virtual shopping experience.
- Face Liveness Detection for Security: Add Flutter face liveness detection to banking or healthcare apps to ensure that real users, not spoofed photos, are accessing sensitive services.
- Fun Extensions for Entertainment Apps: Go beyond Snapchat to build mini AR games, live streaming effects, or even cartoon filters using Flutter ARCore augmented faces demo.
These advanced use cases make Face AR in Flutter not just fun but also business-ready.
FAQs
- You can use the Flutter camera plugin along with Google ML Kit or MediaPipe for real-time face detection, then overlay masks, stickers, or effects for Snapchat-style filters.
- Yes, MediaPipe provides 468 facial landmarks that you can integrate into Flutter for advanced face mesh tracking, perfect for AR filters, glasses, or beauty effects.
- The best approach is to combine the camera with Google ML Kit Face Detection or MediaPipe.
- For advanced cases, ARCore/ARKit plugins can enhance Flutter Face AR filters.
- Reduce model size, limit frames processed, and optimize rendering.
- Running Flutter live video filters at 30 to 60fps ensures smooth user experiences.