Since the pandemic, online travel bookings are booming more than ever.
Travelers expect smooth, fast, and secure platforms to book flights, hotels, and packages without hassle.
If you are trying to maximize opportunities, then this is the perfect time to build a travel booking website in ReactJS.
Why ReactJS? Because it’s fast, scalable, and flexible, exactly what modern travel websites need.
With React’s component-based structure, you can easily add features like flight search, hotel booking, and payment systems while keeping performance top-notch.
In this step-by-step guide, we’ll show you how to build a travel booking website in ReactJS from scratch.
You’ll learn everything from project setup to deployment, and you’ll also get access to the full GitHub repository with source code so you can try it yourself.
What Makes a Great Travel Booking Website?
A powerful travel booking website goes beyond just looks; it should be functional, reliable, and user-friendly. Let’s break it down:
- Flight Search: Users should be able to search for flights by location, date, and price.
- Hotel Booking: A simple and fast interface to browse, filter, and reserve hotels.
- Payments: Secure checkout with multiple options like cards, wallets, or PayPal.
- User Dashboard: A personal space where travelers can view past bookings, saved trips, and manage details.
Modern users expect smooth experiences when using a travel booking system in React. No one wants slow pages or confusing navigation.
With React’s virtual DOM and reusable components, you can create a hotel & flight booking ReactJS system that’s fast, responsive, and feels like a native website.
Project Setup: Start Building Your ReactJS Travel Booking Website
Before building features, let’s set up the project properly.
Tools & Dependencies:
- ReactJS is the core framework.
- React Router for smooth navigation between pages.
- Axios / Fetch API for connecting with flight or hotel APIs.
- Tailwind CSS / Material UI for professional design.
- Firebase / Auth0 for user authentication.
Folder Structure:
Keep your project clean and scalable:
/src
/components
/pages
/services
/assets
App.js
index.js
This setup ensures your React travel booking website stays easy to maintain as it grows.
Here in this blog, you can check the ReactJS travel website source code on GitHub for the base setup.
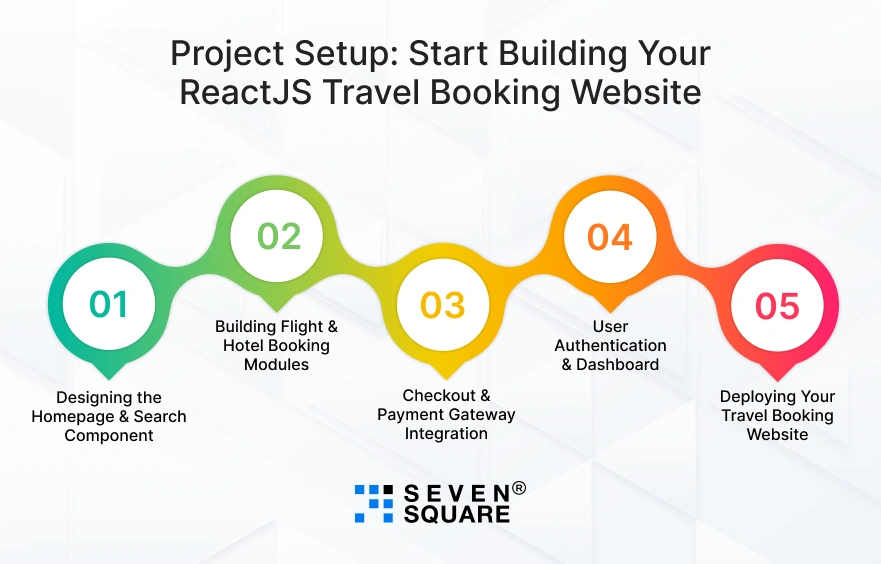
Step 1: Designing the Homepage & Search Component
The homepage is the first impression of your travel platform. A clean landing page with destinations and a search bar makes the website user-friendly.
You’ll add search filters for location, travel dates, and number of travelers.
This step is key when learning how to build a travel booking website in ReactJS with source code.
Code: Search Component
            // src/components/SearchBar.js
            import React, { useState } from "react";

            function SearchBar({ onSearch }) {
              const [location, setLocation] = useState("");
              const [date, setDate] = useState("");
              const [guests, setGuests] = useState(1);

              const handleSubmit = (e) => {
              e.preventDefault();
              onSearch({ location, date, guests });
              };

              return (
              <form onSubmit={handleSubmit} className="p-4 bg-white rounded shadow-md flex gap-2">
                <input
                  type="text"
                  placeholder="Enter location"
                  value={location}
                  onChange={(e) => setLocation(e.target.value)}
                  className="border p-2 rounded w-1/3"
                />
                <input
                  type="date"
                  value={date}
                  onChange={(e) => setDate(e.target.value)}
                  className="border p-2 rounded"
                />
                <input
                  type="number"
                  value={guests}
                  min="1"
                  onChange={(e) => setGuests(e.target.value)}
                  className="border p-2 rounded w-20"
                />
                <button type="submit" className="bg-blue-600 text-white px-4 py-2 rounded">
                  Search
                </button>
              </form>
              );
            }
            export default SearchBar;
Step 2: Building Flight & Hotel Booking Modules
Now let’s create a flight and hotel booking system in React.
This step makes your project functional, letting users search flights and hotels with filters like price, rating, and location.
Code: Flight & Hotel Listings
            // src/components/HotelList.js
            import React from "react";

            function HotelList({ hotels }) {
              return (
              <div className="grid grid-cols-1 md:grid-cols-3 gap-4 mt-4">
                {hotels.map((hotel, index) => (
                    <div key={index} className="border p-4 rounded shadow">
                    <h3 className="text-lg font-bold">{hotel.name}</h3>
                    <p>Location: {hotel.location}</p>
                    <p>Rating: ⭐ {hotel.rating}</p>
                    <p>Price: ${hotel.price}</p>
                    <button className="bg-green-600 text-white px-3 py-2 rounded mt-2">
                      Book Now
                    </button>
                  </div>
                ))}
              </div>
              );
            }

            export default HotelList;
This is a simplified travel booking system React module. You can integrate real APIs like Skyscanner or Amadeus for flight data.
Step 3: Checkout & Payment Gateway Integration
After selecting flights or hotels, users need a checkout page with booking details and payment integration.
In this ReactJS booking website tutorial, we’ll use Stripe for secure transactions.
Code: Payment Checkout
          // src/components/Checkout.js
          import React, { useState } from "react";

          function Checkout({ booking }) {
            const [paid, setPaid] = useState(false);

            const handlePayment = () => {
            // Mock Stripe Payment
            setPaid(true);
            };

            return (
            <div className="p-4 border rounded shadow-md">
              <h2 className="text-xl font-bold mb-2">Booking Summary</h2>
              <p>Destination: {booking.location}</p>
              <p>Date: {booking.date}</p>
              <p>Guests: {booking.guests}</p>
              <p>Total: ${booking.price}</p>

              {!paid ? (
                <button
                  onClick={handlePayment}
                  className="bg-purple-600 text-white px-4 py-2 rounded mt-4"
                >
                  Pay with Stripe
                </button>
              ) : (
                  <p className="text-green-600 font-bold mt-4">Payment Successful 🎉</p>
              )}
            </div>
            );
          }

          export default Checkout;
For real payments, integrate the Stripe API or PayPal SDK in your travel booking website in React with code.
Step 4: User Authentication & Dashboard
A professional booking website must allow users to sign up, log in, and view their bookings.
In this ReactJS travel booking website tutorial for beginners, we’ll use Firebase Auth.
Code: Firebase Auth Setup
          // src/firebase.js
          import { initializeApp } from "firebase/app";
          import { getAuth } from "firebase/auth";

          const firebaseConfig = {
            apiKey: "YOUR_API_KEY",
            authDomain: "YOUR_PROJECT.firebaseapp.com",
            projectId: "YOUR_PROJECT_ID",
            storageBucket: "YOUR_PROJECT.appspot.com",
            messagingSenderId: "SENDER_ID",
            appId: "APP_ID",
          };

          const app = initializeApp(firebaseConfig);
          export const auth = getAuth(app);
In your Dashboard page, you can display past bookings, saved trips, and user details. Full implementation is available in the GitHub repo.
Step 5: Deploying Your Travel Booking Website
Once your website is ready, you need to make it live. You can deploy a travel booking website built with React and Firebase, full code on:
- Vercel: One-click React deployments.
- Netlify: Simple, fast, free hosting.
- AWS Amplify: Scalable for enterprise projects.
Deployment Steps
- Push your code to GitHub.
- Connect your repo to Vercel/Netlify.
- Add a custom domain + SSL for a professional look.
- Share the live demo with your audience.
Check out the Complete Code to Build a Travel Booking Website in ReactJS.
Turning Your Travel Booking Idea into Reality
We create scalable travel booking systems in React that help businesses grow.
Whether you’re a startup, a travel agency, or an enterprise, we make sure your travel booking website in ReactJS stands out.
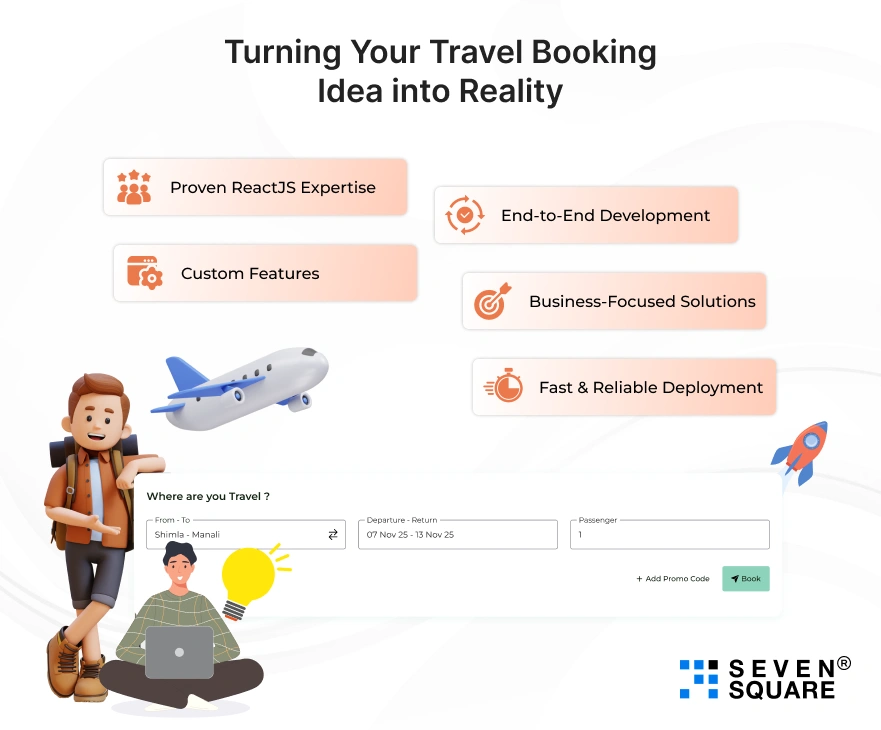
- Proven ReactJS Expertise: Our team has built multiple ReactJS solutions with modern UI, smooth performance, and clean code.
- End-to-End Development: From homepage design, hotel & flight booking modules, checkout, and payments to deployment, we cover it all.
- Custom Features: AI recommendations, multi-language support, & real-time availability, we add everything a modern travel booking website in ReactJS needs.
- Business-Focused Solutions: We know what travelers and businesses expect: secure travel booking systems in React, user dashboards, & smooth transactions.
- Fast & Reliable Deployment: We help you deploy travel booking websites built with React and Firebase full code on Vercel, Netlify, or AWS.
Want a Custom ReactJs Solution? Contact Us Now!
Turning Your Travel Booking Idea into Reality

If you want your project to go beyond the basics, here are advanced features you can add:
- AI-Based Travel Recommendations: Suggest flights, hotels, or destinations based on user behavior.
- Multi-Language & Currency Support: Make your website global-friendly.
- Real-Time Seat & Hotel Availability: Show users live updates as they search.
- Mobile-First & PWA Approach: Turn your project into a modern travel booking website in ReactJS that works smoothly on mobile.
These features not only impress users but also give your website a competitive edge.
Build Your Own ReactJS Travel Booking Website Today

You’ve learned how to set up, design, and deploy a travel booking website in ReactJS from homepage to payments.
With React, development is faster, scalable, and ready for future growth.
Now it’s your turn. Explore the full GitHub repo, customize it, and start building your own React travel booking website today!
FAQs
- Yes, with our step-by-step tutorial and ReactJS travel booking website GitHub repo, even beginners can easily build a working React travel booking app from scratch.
- You can integrate APIs like Amadeus or Skyscanner with React components to build a hotel & flight booking ReactJS system that lets users search, filter, and book in real time.
- You’ll need ReactJS, React Router, Axios, Tailwind or Material UI, and Firebase for auth.
- You can add Stripe or PayPal in React components to enable secure checkout and smooth transactions for your ReactJS travel booking website.